Staging an Occupied Home: Before and After Photos
Posted by Dan Miller, REALTOR on Wednesday, July 8th, 2015 at 12:49pm.
 Staging your home is the single best investment you can make prior to putting your property up for sale. Professional staging enhances your listing photos, your listing video, and your showing activity. It leads to better first impressions - both online and in-person. All of this leads to more offers, a quicker sale, and a higher selling price for your home.
We hire a professional stager to consult with each client well before each listing hits the open market. As you will see from the "before" and "after" photos below, the results are truly amazing. These real-life examples come courtesy of home stager extraordinaire, Ronna Nyman.
Ronna met with our clients and developed a detailed staging plan for their home. Our clients took Ronna's advice to heart and implemented nearly every recommendation. Then our professional photographer shot the listing photos and video. Our clients were rewarded for their hard work and smart marketing. Their home received 4 offers in 2 days and sold for $7,000 above the list. The photos below demonstrate how our clients transformed their home into a showcase listing.
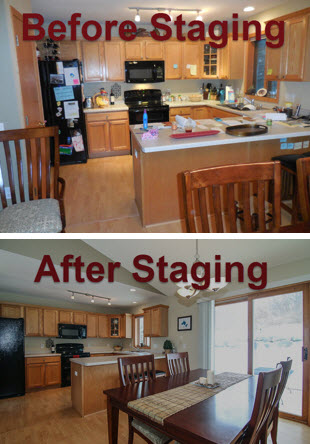
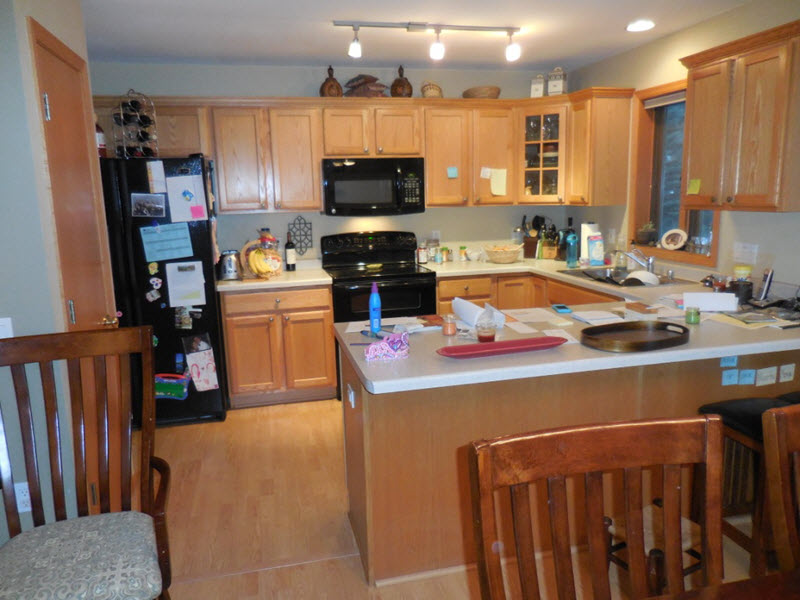
Kitchen Before Staging
This photo was taken on the day of the staging consultation. This is what you expect a kitchen to look like in a growing household with a busy family schedule.
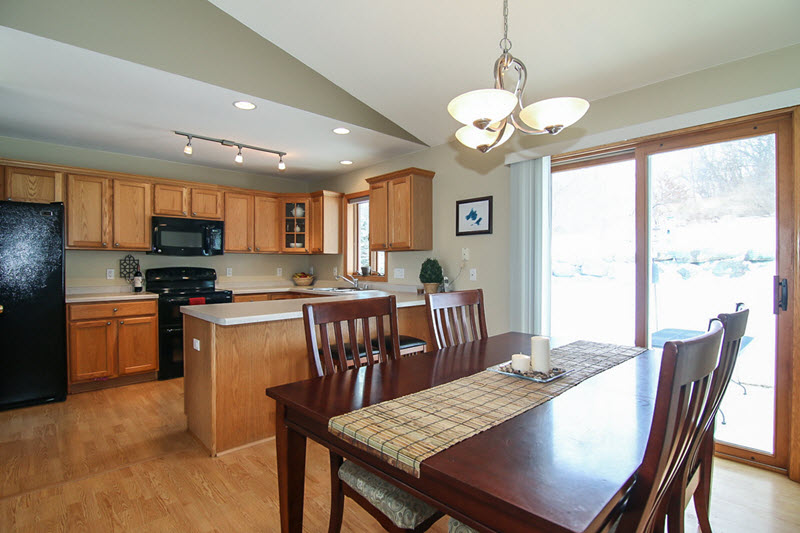
Kitchen After Staging
Here is the listing photo after staging was completed. This picture provides a great example of how professional staging and professional photography can work together to completely transform a space. Notice how much bigger and brighter the space appears in photo #2. With the exception of a few well-placed focal points, every item was removed from the kitchen surfaces. Our photographer's wide angle lens captured much more interior space and exposed much more natural light than the amateur photo above.
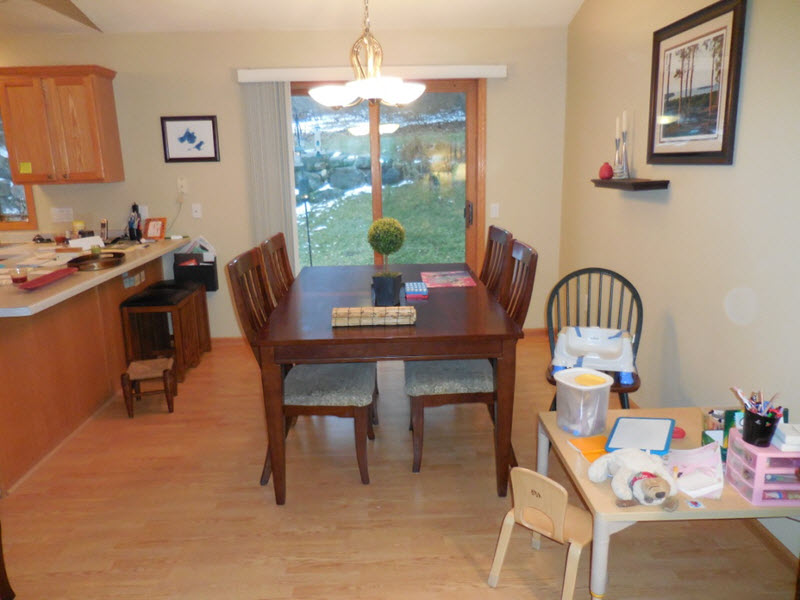
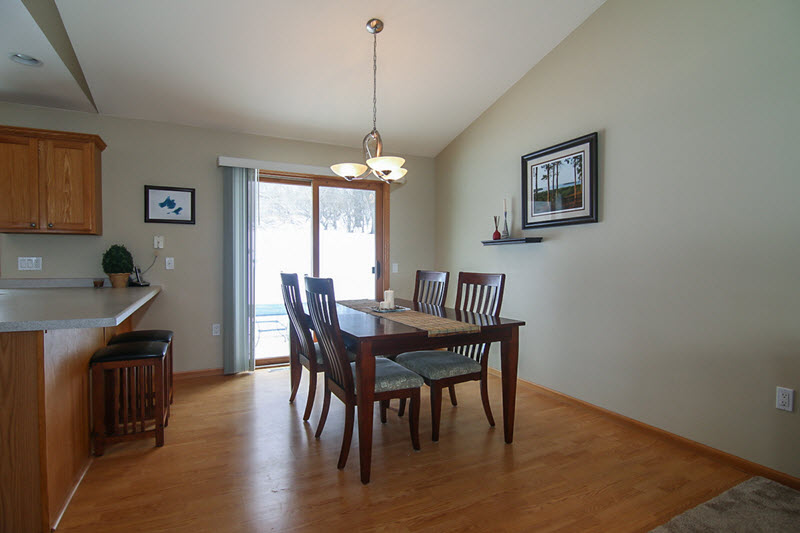
Dining Room Before Staging
Before the dining room was staged, a small foot stool, a small crafting table, and a few other odds and ends were located within the room.
Dining Room After Staging
After the dining room was staged, this room took on a whole new vibe. The foot stool and crafting table were removed from the room. All contents were removed from the table and replaced with a runner and a small candle set. What other subtle changes do you see which added to the appeal of this room?
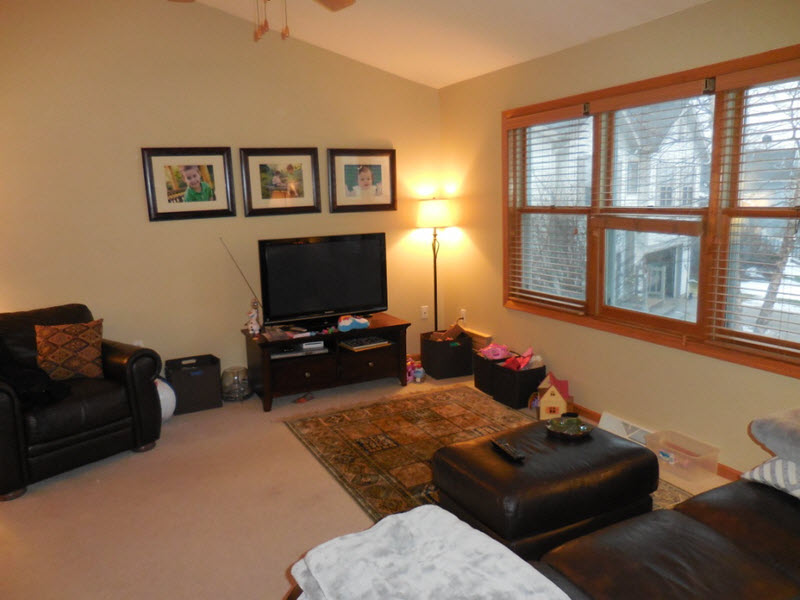
Living Room Before Staging
Here is the living room before staging. Prior to staging, photos were on the walls. Toys were stored in floor bins. The carpet had become slightly worn over time.
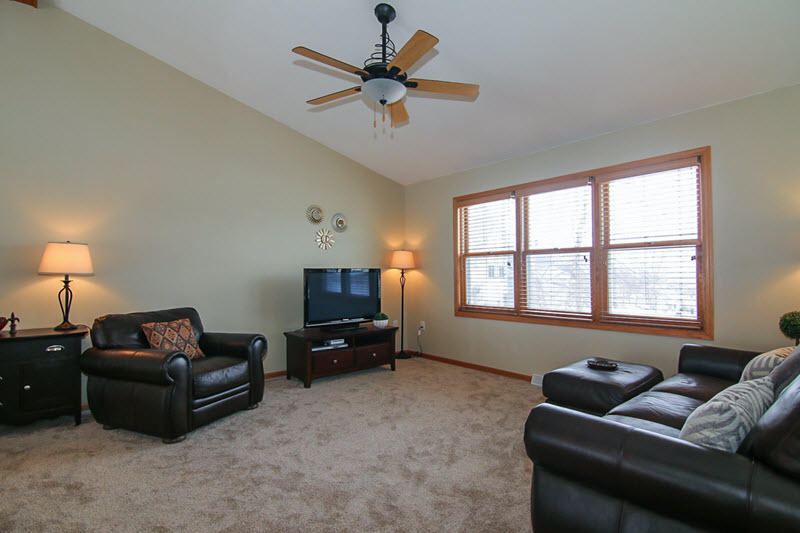
Living Room After Staging
Here is the living room after staging. Artwork replaced the photos on the wall. All items were removed from the floor. The furniture was slightly rearranged. The original carpet was replaced with brand new carpet. For a cost of about $2,000, the sellers replaced the carpet in the main level living room, hallway, and all three bedrooms.
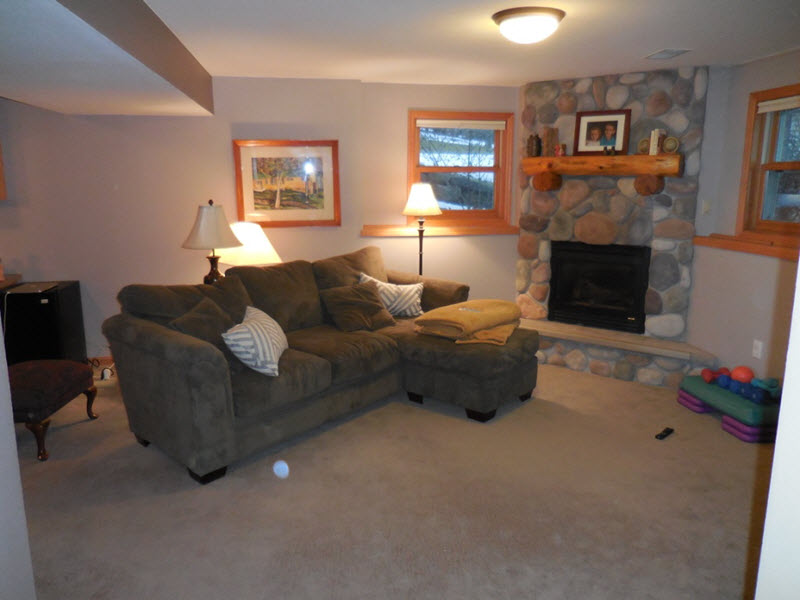
Family Room Before Staging
Here is the lower level family room on the day of the staging consultation.
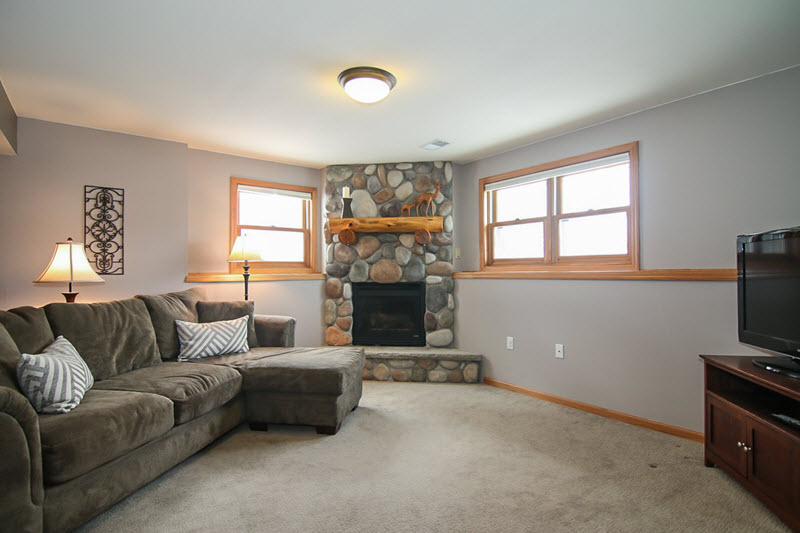
Family Room After Staging
Here is the family room after staging. In only a few minutes of time this room is completely transformed. These before and after photos offer a great example of how a few subtle adjustments can make a big impact on first impressions. What differences do you see between the before and after photos?
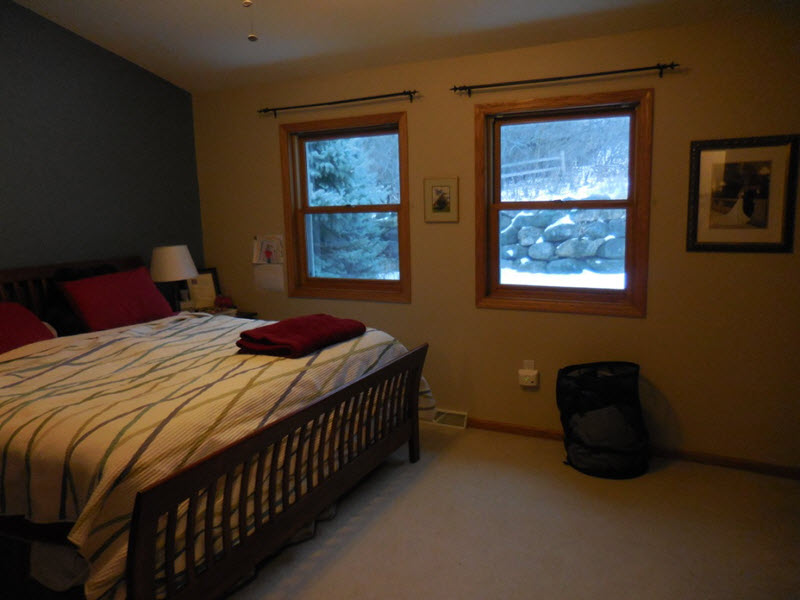
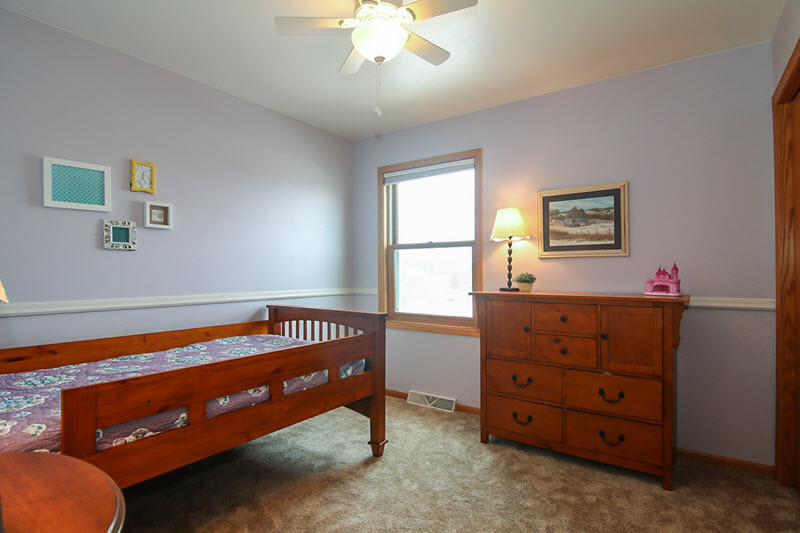
Master Bedroom Before Staging
This is the master bedroom on the day of the staging consultation.
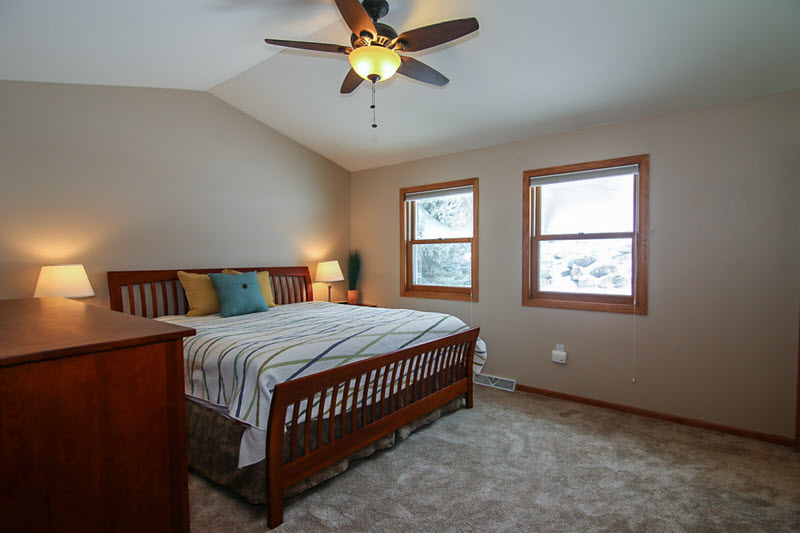
Master Bedroom After Staging
Here is the listing photo for the same room. The dark accent wall was painted with a lighter color to enlarge and brighten the space. The hamper was relocated out of view. All artwork was removed from the walls. All of the items on the night stand were removed and replaced with a simple decorative piece. Decorative pillows were placed on the bed to add color and a focal point to the room.
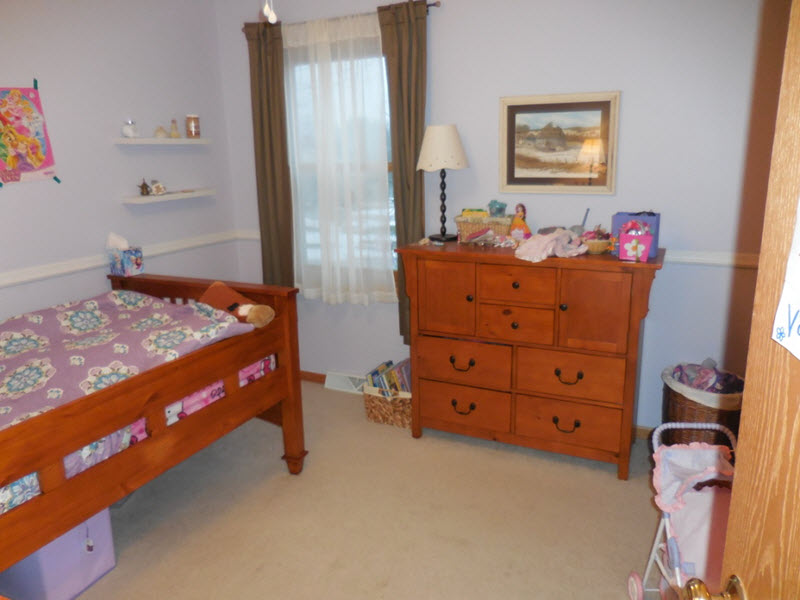
Child Bedroom Before Staging
Prior to staging, the floor and dresser top were used for storage.
Child Bedroom After Staging
After staging, items were removed from the floor and dresser top. There are a number of other changes which were made to this room. Can you find them?
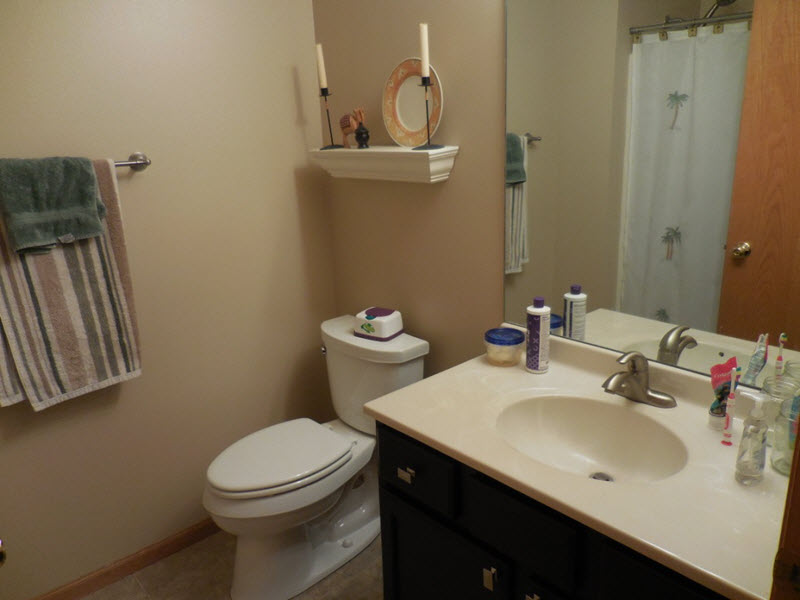
Bathroom Before Staging
Prior to staging, the vanity top was used for storage. The towel color scheme included greens and browns.
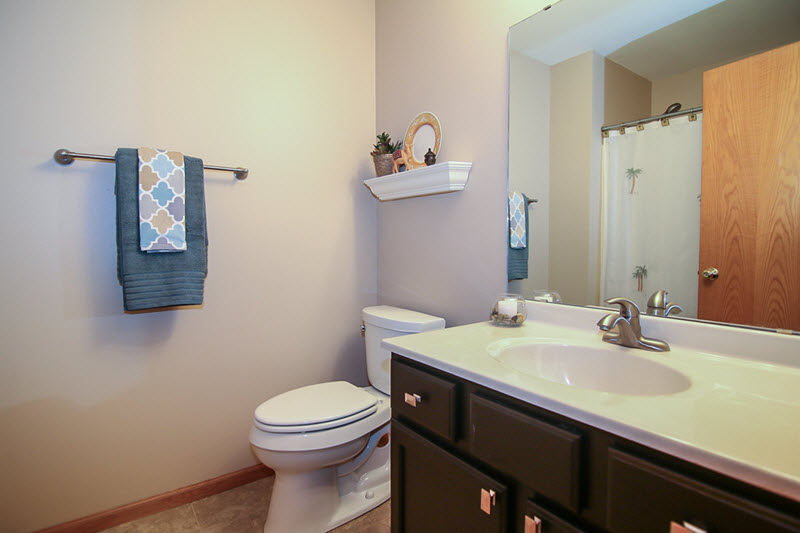
Bathroom After Staging
After staging, the vanity top was cleared. The original towels were replaced with a blue color scheme which added a fresh, new look.
More about Staging an Occupied Home: Two Options
Depending on your needs, you can implement your staging plan using one of two different approaches. If your home requires a focused effort over several weeks of time, you will want our stager to issue a written report of recommendations. The report serves as your guide as you prepare your home for sale in the weeks ahead.
If your preparation requires less effort and less time, you can ask our stager to implement your staging plan during her visit with you. With this approach, your consultation becomes a working session that is geared toward getting your home camera-ready, right away. By the end of your session you can expect your staging plan to be 90% complete.
Getting your Home Ready to Sell: Taking the Next Step
Many home owners have questions about cosmetic updates and home maintenance that should be completed prior to putting a home up for sale. We're happy to tour your home with you and offer our recommendations. As needed, we can also refer you to reliable contractors who can help you move forward with your plans quickly.
Do you have questions about the home-selling process? Feel free to call Dan Miller at 608-852-7071. Or contact us online. We're here to help you move forward with your real estate goals.